Many Americans plan trips to Hanoi, Hoi An, or Ho Chi Minh City assuming they can enter Vietnam without a visa. Some only discover at airline check-in that a U.S. …

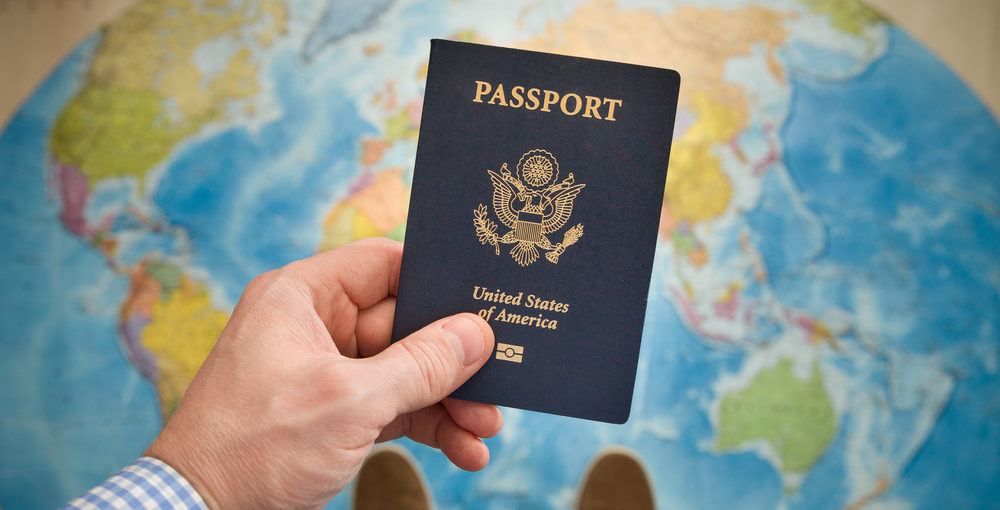
Vietnam continues to attract more American travelers with its lively cities, dramatic scenery, world-famous food, beautiful beaches, and excellent value. Yet many U.S. citizens planning their first trip are unsure whether they need a tourist visa, which option to select, or how to complete the application correctly. This guide explains the Vietnam travel visa process for Americans in clear, practical terms, covering eligibility, required documents, application steps, processing options, and essential tips for entering the country with fewer complications.
In most situations, U.S. passport holders must obtain a valid visa before traveling to Vietnam.
A limited exception may apply to travelers visiting Phu Quoc Island. An American traveler may be eligible for a visa-free stay of up to 30 days when arriving directly from outside Vietnam, remaining exclusively on Phu Quoc, and meeting the applicable entry conditions.
This exemption does not cover a wider trip through Vietnam. You will need a valid visa if your itinerary includes destinations such as Ho Chi Minh City, Hanoi, Da Nang, Hoi An, Nha Trang, Ha Long Bay, or any location outside Phu Quoc.
Travelers should also be careful when booking connecting flights. Entering Vietnam through an airport elsewhere in the country before continuing to Phu Quoc may affect eligibility for the island exemption.
Visa and immigration rules can change, so review the current requirements before purchasing nonrefundable tickets or beginning your application.

The right visa depends on your itinerary, length of stay, number of planned entries, and departure date.
For most American vacationers, the Vietnam eVisa is the simplest and most practical option. The application can be completed online before departure, with no routine visit to an embassy or consulate.
Vietnam’s electronic visa can be issued for a stay of up to 90 days and may allow either a single entry or multiple entries. The approved duration and permitted entry type are shown on the issued visa.
A single-entry eVisa is generally sufficient when you plan to enter Vietnam once, travel within the country, and depart without returning during the same trip.
A multiple-entry eVisa is more appropriate when your plans include leaving Vietnam and coming back while the visa remains valid. For example, you may spend several days in Vietnam, visit Cambodia or Thailand, and then return to Vietnam for your flight home.
Choose carefully when applying. A single-entry visa cannot be used again after you leave Vietnam, even when its printed expiration date has not yet passed.
Visa on Arrival is not the same as arriving in Vietnam without prior authorization and requesting a tourist visa at the airport.
Where this arrangement is available, the traveler must obtain the necessary approval documentation before boarding the flight and complete the remaining procedure at an eligible Vietnamese international airport. It may be considered in certain urgent or specially arranged cases.
Because availability and eligibility can depend on the traveler’s circumstances, Americans should confirm the exact procedure before relying on this option. For most ordinary tourism trips, applying for an eVisa before departure is more straightforward.
A successful application begins with accurate documents and information. Prepare everything before opening the form so you can complete it without rushing.
Use the passport you intend to carry on your trip. Its details must match the visa application exactly.
Your passport should have adequate validity for your journey. Many airlines and travel providers recommend at least six months of remaining validity when entering Vietnam. Renew it before applying if it is damaged, close to expiration, or does not have sufficient usable space.
Do not apply with one passport and travel with another. If you renew or replace your passport after the visa is issued, you may need to obtain a new visa connected to the new passport.
You will usually need a clear image of the biographical page containing your photograph and personal details.
The entire page should be visible. Avoid glare, shadows, cropped edges, blurred text, fingers covering the page, or reflections from protective plastic. A poor-quality upload can make verification more difficult and may delay the application.
Prepare a recent, front-facing portrait photo that meets the application requirements.
Use a clear image with a plain background and an unobstructed view of your face. Do not use a heavily edited selfie, a group photograph, or a picture in which you are wearing sunglasses.
The portrait image and passport-page image serve different purposes, so make sure you upload each file in the correct field.
Enter all information exactly as it appears on your U.S. passport, including:
Pay close attention to middle names, spacing, numbers, and date formats. Never use a nickname or shortened version of your name.
Use an email address you can access throughout the application period. Notifications, application updates, and visa-related documents may be delivered electronically.
Review your inbox regularly and check the spam or junk folder as well. Keep your application or registration code in a secure place because it may be needed to check the result.
You may be asked to provide details such as:
Your approved visa should cover your entire itinerary. Selecting the wrong entry date or checkpoint can create difficulties at check-in or immigration.
Many visa problems are not caused by complex immigration issues. They result from small errors that could have been caught before submission.
Common examples include:
Review every field against the passport rather than relying on memory.
The online procedure is manageable when completed carefully and in the correct order.
Before starting the form, prepare:
Having these items ready reduces the risk of entering inconsistent information or abandoning the form midway through the process.
Enter the requested information exactly as shown in your passport. Select your visa dates, entry checkpoint, and single-entry or multiple-entry option based on your actual travel plans.
Read each answer before moving to the next section. A quick review at this stage can prevent a costly correction later.
Travelers who would prefer professional assistance can submit their information through https://www.vietnamimmigration.com/apply-vietnam-visa/. A visa support team can review the documents and application details before submission, helping identify common errors and determine a suitable processing option.

After completing the form, pay the required visa or service fees through the available payment method.
The official government eVisa portal currently lists a fee of USD 25 for a single-entry eVisa and USD 50 for a multiple-entry eVisa. Government fees are generally nonrefundable when an application is refused. Fees charged by a private support provider are separate and may vary according to the service and requested processing speed.
Save the payment confirmation, application reference number, and any related email messages until your trip is complete.
Use your registration details to check the application status. Do not assume that silence means approval.
Respond promptly if additional information or a replacement image is requested. Delayed responses may affect the processing schedule.
When the visa is approved, download the complete document and save it in more than one location.
Do not stop after seeing the word “approved.” Compare the visa carefully with your passport and itinerary.
Check the following:
Contact the relevant authority or service provider immediately if anything appears incorrect. It is much easier to address a problem before the flight than at the airport.
Before leaving the United States, keep these items easily accessible:
Do not place your only visa copy in checked baggage. Airline staff may ask to see proof of authorization before allowing you to board.
The official electronic visa system states that an application is generally processed within three working days. However, travelers should not treat this as a guaranteed deadline.
A practical guide to common processing options is:
| Processing option | Typical estimated timeframe |
|---|---|
| Standard processing | Approximately 3–5 working days |
| Urgent processing | Approximately 1–2 working days |
| Super-urgent assistance | Approximately 2–8 hours in eligible cases |
Urgent and super-urgent timeframes are expedited service estimates rather than universal government guarantees. Availability can depend on when the application is submitted, the traveler’s circumstances, the accuracy of the documents, immigration review, weekends, and Vietnamese public holidays.
Several factors may extend the process:
Apply well in advance whenever possible. Waiting until the final days before departure leaves little room to correct an error or respond to an additional request.
A few practical habits can make the application significantly easier.
Submitting the application one or two weeks before departure provides a useful buffer. Travelers with flexible plans or complex itineraries may prefer to apply even earlier.
Expedited processing can be valuable when time is limited, but it should be a backup rather than the first choice.
Look at the passport’s expiration date, condition, and identifying information before purchasing flights. If renewal is necessary, complete it before requesting the visa.
The approved visa is linked to the passport information entered in the application.
Names and passport numbers must be exact. The difference between the letter “O” and the number “0,” or between “1” and “I,” can be easy to miss.
Compare each field directly with the passport page at least twice before submitting.
Think beyond your first arrival. A side trip to Laos, Cambodia, Singapore, or Thailand followed by a return to Vietnam normally requires multiple-entry permission.
Your visa should also be valid from the day you expect to arrive through the final day you intend to remain in the country.
Do not wait until departure week to look for the result. Monitor both your email and the application-status system.
Save screenshots or copies of important messages, payment confirmations, and registration details.
Store the visa on your phone, in secure cloud storage, and as a printed document. A printed copy can be particularly useful when internet access is unavailable or airport staff need to inspect the document quickly.
The application may appear simple, but the details matter. Travelers often turn to professional assistance when they want an extra document check, are unfamiliar with the process, or have little time before departure.
A visa support service may help by:
This can be particularly helpful for first-time visitors, families submitting several applications, business travelers with fixed schedules, and passengers who discover a visa issue close to departure.
Through https://www.vietnamimmigration.com/apply-vietnam-visa/, travelers can request professional visa assistance, document verification, expedited processing where available, and 24/7 support. The service team has more than 15 years of experience handling Vietnam visa and entry-related cases.
For eligible urgent applications, processing options may range from two to eight hours. The service also states that qualifying customers are covered by a refund policy when the visa is not delivered within the committed timeframe. Review the applicable terms and conditions before payment so you understand the coverage, exclusions, and required documentation.
No private agency can replace the authority of Vietnam’s immigration officials. Professional assistance is most valuable as a way to improve preparation, reduce avoidable errors, and receive guidance throughout the process.
Obtaining a Vietnam travel visa as a U.S. citizen is usually straightforward when you choose the correct entry type, prepare clear documents, and enter your passport information accurately. The eVisa is the most convenient solution for many American tourists, with single-entry and multiple-entry options available for stays of up to 90 days.
Apply early, check the issued visa carefully, and carry both printed and electronic copies during your journey. Travelers who need additional guidance or have a departure date approaching can use https://www.vietnamimmigration.com/apply-vietnam-visa/ to request professional support and select an available processing option.
With the visa arranged before departure, you can focus on the far more enjoyable part of planning: deciding where to go, what to eat, and which unforgettable corners of Vietnam to explore first.
Many Americans plan trips to Hanoi, Hoi An, or Ho Chi Minh City assuming they can enter Vietnam without a visa. Some only discover at airline check-in that a U.S. …
Your flights are booked, your hotel reservations are confirmed, and you’re already looking forward to exploring the bustling streets of Hanoi, wandering through the ancient town of Hoi An, or …
Planning a trip to Vietnam but unsure whether U.S. citizens can apply for a tourist visa entirely online? Wondering if you’ll need to mail your passport, visit an embassy, or …
Planning a vacation from the United States to Vietnam? Before confirming every hotel, tour, and domestic flight, make sure your visa is handled correctly. Vietnam’s online eVisa system makes applying …
Have you just booked a last-minute trip to Vietnam only to realize you still don’t have a visa? Or maybe your business schedule changed unexpectedly, and now you’re scrambling to …
Is there really such a thing as an express Vietnam tourist visa? Can a U.S. citizen receive a visa when a flight is only a day or even a few …
Vietnam has quickly become one of the most exciting destinations for travelers from the United States. From the bustling streets of Hanoi to the tropical beaches of Phu Quoc and …
If you’re a U.S. traveler planning a trip to Ho Chi Minh City, figuring out Vietnam’s visa requirements can feel overwhelming. The process may seem complicated at first, especially if …
Many American travelers only realize how critical visa timing is when it is already too late. Imagine arriving at the airport fully prepared for your trip to Vietnam, only to …